How to Import Outlook PST in Mac Mail? – [2024 Tutorial]

Mac Mail is a popular email application for Mac OS and holds the majority of the email application market across the globe. Several users constantly search for solutions that could import Outlook PST in Mac Mail. So, the blog here addressed different methods that transfer Outlook Data File (.pst) to Mac Mail with emails and attachments.
Microsoft Outlook is a widely used email application. It is used to organize meetings, schedule tasks, send essential invites, and more. Users mostly have a need to import Outlook PST in Mac Mail for many reasons. Thus, we have discussed few useful ways in the further section that import PST file into Mac Mail with emails and attachments.
Outlook keeps the entire users mailbox data into PST and Apple Mail stores the data in MBOX. And in the next section we have offered both manual and professional methods for converting PST files to MBOX and migrating PST mailboxes to Mac Mail. But first, let us know why users need to switch from Outlook in Mac Mail.
Why to Import Outlook PST in Mac Mail?
There are several situations that force users to import Outlook PST in Mac Mail, such as –
- Migrating to experience a new environment (Windows to Mac).
- Requirement of a feature that is available only in Apple Mail.
- Sudden or unexpected crash of Windows Outlook.
- Corrupt PST file.
- Received official PST files from a client working on Windows.
- Mac Mail does not need any license for upgradation.
- Available free of cost.
Now, after having a basic understanding of why users need to import Outlook PST in Mac Mail, let’s discuss the methods to implement the email transfer and other mailbox data.
Manual Approach to Import Outlook PST in Mac Mail
In the segment, we have highlighted two technical ways that helps importing PST in Mac Mail with emails and attachments. However, the manual method is complex and time-consuming and also need lot of time and energy of users.
Method 1. By using Google Mail Account
The manual method will use Google Mail account to transfer emails from Outlook in Mac Mail. First, configure Gmail in Microsoft Outlook and later add the same account in Apple Mail on Mac. Follow the steps discussed below to execute the operation –
Stage 1. Enable IMAP in Google Mail
Step 1. Login to Google Mail account.
Step 2. Go to gear icon at the top-right corner representing Settings and click See all Settings.
Step 3. Navigate to Forwarding and POP/IMAP.
Step 4. Select Enable IMAP.
Step 5. Tap Save Changes option.
Stage 2. Set up Google Mail in Microsoft Outlook
Step 1. Run Microsoft Outlook.
Step 2. Click File >> tap Add Account.
Step 3. Tap New from Account Settings Wizard.
Step 4. Go to Email Account and press Next.
Step 5. Navigate to Manual Setup and press Next.
Step 6. Click Internet Email and tap Next.
Step 7. Mention name, email ID, and password in a new screen.
Step 8. Shift account type to IMAP.
Step 9. Enter Incoming Mail Server as imap.gmail.com.
Step 10. Enter Outgoing Mail Server as smtp.gmail.com.
Step 11. Tap More Settings.
Step 12. Choose My Outgoing server requires authentication appearing under Outgoing Server menu.
Step 13. Tap OK and press Next.
Step 14. Hit Finish to end the setup.
Step 15. Drag the necessary emails from Microsoft Outlook profile and drop the same into required Google Mail folder.
Stage 3. Configure Google Mail in Mac Mail
- Run Apple Mail.
- Move towards Mail and tap Add Account.
- Choose Google and press Continue.
- Specify details such as name, email ID, and account password and click Continue.
- Provide details in specific fields.
- Now, move emails from Google Mail folder to Mac Mail folder.
Method 2. By using Mac Outlook
Follow the steps discussed below to export PST from Windows Outlook –
Stage 1. Extract PST from Windows Outlook
- Run Microsoft Outlook and choose Open & Export.
- Select Import/Export, pick Export to a file option and hit Next.
- Opt Outlook Data File (.pst) option and hit Next.
- Choose the folders and items that are required to export and press the Next button.
- Provide the destination path to save PST and tap Finish button.
Stage 2. Import Outlook PST in Mac Mail
- Run Outlook for Mac.
- Navigate to File and click Import.
- Utilize Outlook for Windows archive file (.pst) option.
- Press Continue.
Stage 3. Generate .mbox file and import to Mac Mail
- Run Mac Mail.
- Click File and tap Import Mailboxes…
- Choose Files in MBOX format and hit Continue.
Direct Approach to Import Outlook PST in Mac Mail
MacMister PST Converter for Mac is useful in importing Outlook PST in Mac Mail with emails and attachments. The app quickly performs the PST conversion into MBOX and delivers the results without data loss. The interface of the application is friendly and is easily accessible by all professional and novice users.
Moreover, the software has wonderful features with the help users can import Outlook PST in Mac Mail as per specific requirements. One can also take help of a free demo that allow users to evaluate and analyze the process for free.
Working Steps to Import Outlook PST in Mac Mail on Mac
Step 1. Install and run MacMister PST to MBOX Converter for Mac on Mac OS.

Step 2. Utilize Add File(s) button to add PST files on the app or make use of Add Folder button to add PST files folder on the tool and click Next to continue.

Step 3. The app will immediately list PST files with selected checkboxes on the tool. However, users can deselect these checkboxes and select the checkboxes of necessary listed items to import selected files into Mac Mail, if needed. Otherwise, move ahead by tapping Next button.

Step 4. Navigate to Select Saving Options to select MBOX from the menu.

Step 5. Set MBOX options as per the requirements and click on the Export button.
Step 6. The Live Conversion Report will appear displaying the details of conversion progress of PST files.
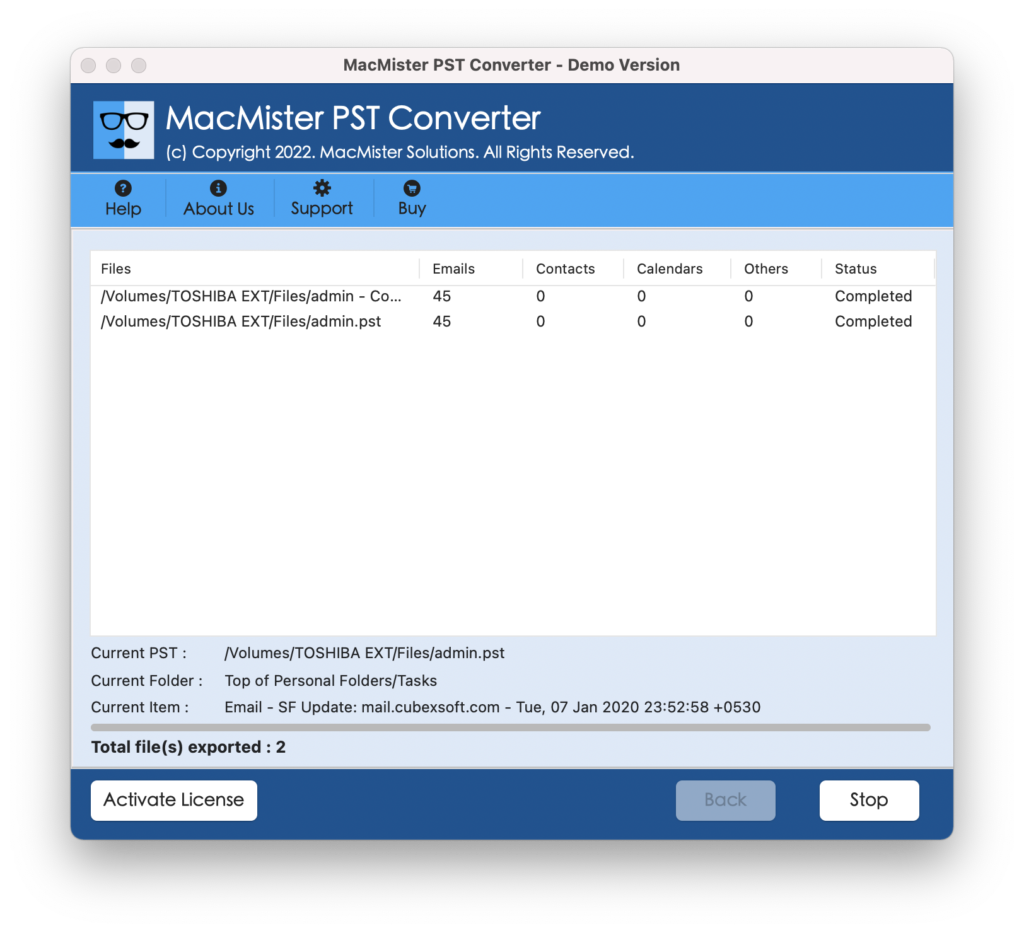
The tool will successfully conclude the process with a message “Conversion Completed”. Click on the OK button to exit.
Import converted files in Mac Mail using the steps mentioned –
- Run Mac Mail.
- Click File >> Import Mailboxes…
- Continue by selecting Files in MBOX format option.
- Press Continue button.
- Go to the destination path of converted files. Select them and press Choose.
- The import process will start and complete within seconds by enabling the Done button. Click on it to finish the process.
Now, Mac Mail will show the imported files on the left pane under On My Mac. Users can open the required email to see if the content is appearing correctly or not. However, there will be no alteration in the original files. The data, layout, and metadata properties remain precise throughout the process.
Epilogue
In the write-up, we have discussed multiple strategies to fix “how to import Outlook PST in Mac Mail” with emails and attachments. The first and second methods are manual. They are free of cost but the steps are lengthy and technical. Also, make sure to operate the steps under expert’s assistance. The third method is cost-effective yet reliable, advanced, and direct. It instantly performs the process and provides the outcome without altering the original data. The app also has a free demo that allows understanding of complete software working and features free of cost.